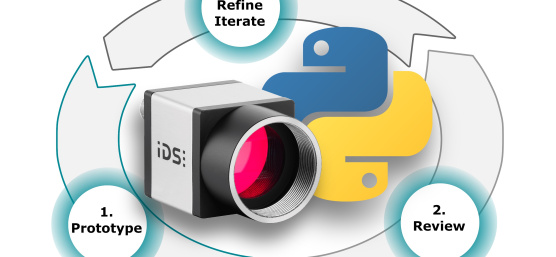
Rapid prototyping camera applications
Interactive programming with IDS peak and uEye+ cameras
Python is a very common programming language in the Internet of Things (IoT). It allows writing and testing short code snippets without the time-consuming setup of a complete development environment. The possibility of interactive programming makes it the ideal interface for the testing and trial phase. Especially in combination with embedded systems, Python is a winner, as no time-consuming cross-compiling is necessary.
With IDS peak you can also use the advantages of Python for programming your uEye+ camera applications. The numerous camera features of IDS industrial cameras can be tested quickly, analysed and prepared for later use in a larger software project. With this tech tip, we would therefore like to explain the programming of uEye+ cameras via the IDS peak python interface in more detail.
The Python source code examples used illustrate the basic handling of the cameras and the interface. They are designed as "Jupyter notebooks". This allows them to be tested and reproduced live in the open source web application with your uEye+ cameras.
We describe the installation and use of the Jupyter notebooks as an example for a Windows 10 PC. Since Python is available for several platforms and Jupyter Notebooks is a platform-independent web application, you can of course also run and test the source code examples under Linux.
Requirements
Python
Python is a prerequisite for installing Jupyter Notebook and for our IDS peak programming examples.![]() Download and install Python
Download and install Python
Which Python version to install?
In the readme file for your installed IDS peak installation you will find information on the compatible Python version that you should install.
In the IDS peak manual chapter "Creating a project with PyCharm" you will find the link to the appropriate readme file for your operating system.

Make sure that Python is installed for "all users" and that Python is added to the "path" variable. Then you can also use Python via the command prompt.
Additional Python libraries
In the source code examples we use additional Python libraries for image processing and data visualisation. You still have to install this as well.
- PIL - The Python Imaging Library extends your Python interpreter with image processing functions.
- matplotlib - Matplotlib is a comprehensive library for creating static, animated and interactive visualisations in Python.
- OpenCV - Computer Vision Library
- pyTorch - Deep Learning Framework
Also install the libraries via:
pip install Pillow
pip install matplotlib
pip install opencv-python
pip install torch
IDS peak
For operation and programming of uEye+ cameras, install the IDS peak SDK (Software Development Kit). It includes all the libraries and software tools that are necessary.![]() IDS peak Software Development Kit
IDS peak Software Development Kit
Then install the IDS peak API and IPL Python bindings hosted at PyPI.org. The easiest way is via "pip", the package management programme for Python packages, using PowerShell (as administrator):
python -m pip install --upgrade pip
python -m pip install ids_peak_ipl
python -m pip install ids_peak
Jupyter Notebook
The installation of the open source web application is also very simple with pip:
pip install notebookIf you need more info about Jupyter Notebook:
First steps with Jupyter Notebook![]()

![]() Install Jupyter Notebook
Install Jupyter Notebook![]() Jupyter Documentation
Jupyter Documentation
Run Jupyter Notebooks
 Next, unpack the source code example in a folder on your PC.
The package contains only one file. The Jupyter sample notebook.![]() ids-peak-python-sample-jupyter.zip
ids-peak-python-sample-jupyter.zip
Notebook Server
Open a Powershell window (user rights are sufficient) and start the Jupyter Notebook Server.
Open Powershell in folder
Start the server directly in the installation folder of the sample notebook, then the notebooks are directly available to you.
To open a PowerShell window directly in a specific folder, first navigate to this directory in the Explorer, type "powershell" in the path bar at the top and confirm with "Enter".
PS C:\Users\ids\ids-peak-jupyter-notebooks> jupyter notebook
[I 12:12:45.115 NotebookApp] Serving notebooks from local directory: C:\Users\ids\ids-peak-jupyter-notebooks
[I 12:12:45.115 NotebookApp] The Jupyter Notebook is running at:
[I 12:12:45.115 NotebookApp] http://localhost:8888/?token=f8baad4df16a4b1436c59723cfcba540c4b5a923b3352120
[I 12:12:45.115 NotebookApp]  or http://127.0.0.1:8888/?token=f8baad4df16a4b1436c59723cfcba540c4b5a923b3352120
[I 12:12:45.115 NotebookApp] Use Control-C to stop this server and shut down all kernels (twice to skip confirmation).
The Notebook server opens in your default web browser at start-up and outputs a bit of information in the shell, including the URL of the web application (http://localhost:8888 by default). When the server is opened in your browser, you will see the Notebook dashboard, which displays a list of notebooks, files and subdirectories in the directory where the Notebook server was started.

Use Notebook
Now simply open the notebook "ids-peak-python-sample-jupyter.jpynb" in the server.

The notebook is annotated and self-explanatory. You can run it and also customise it for your requirements and save it again. The IDS peak Jupyter Notebook guides you through the basic handling of uEye+ cameras using Python, such as finding and opening the devices, adjusting camera settings and taking pictures. Furthermore, we demonstrate how image data can be converted with the IDS peak IPL (Image Processing Library) into different data formats for image processing processes of OpenCV. Further processing in OpenCV is also shown with some standard functions. Finally, you will see how quickly a deep learning framework such as pyTorch can be involved to realise simple object recognition in the camera images.
For more information about IDS uEye+ cameras or their programming with IDS peak, visit the Knowledge Base of our website or contact our system consultants.
Tip: uEye+ webinar-video
Our webinar video "Rapid prototyping camera applications" demonstrates programming with the IDS peak Pyhton interface using this Jupiter notebook.
Dipl.-Ing. Heiko Seitz is working at IDS since 2001. After years as a developer in the field of camera software, he now supports technological communication at IDS as Product Marketing Manager. With his experience, he bridges the gap between complex technology and practical knowledge transfer – for example in technical articles, webinars, or lectures.
Vision Channel
Videos and live sessions about machine vision.
Your project
How can we support you in your project? Together we will find the right solution for you!
Newsletter
Stay up to date and subscribe to our newsletter.