Quick Start Guide
IDS NXT Experience Kit
The Quick Start Guide is a step-by-step tutorial and is intended for users who are commissioning an IDS NXT camera for the first time.
Learn quickly which application possibilities can be solved with it and get to know the way to your first own embedded vision solution with IDS NXT.
IDS NXT Experience Kit
The following components are included:
Licence card

IDS NXT rio

Lens

Tripod adapter

Power cable

Ethernet cable

Power supply & adapter

Tutorial video about unboxing the kit
In our Vision Channel you can also find an unboxing video for the IDS NXT Experience Kit. We unpack the kit and show how to get it up and running quickly with sample applications. Of course, we also take a look at the bundled tools and components that you can use to develop your own solutions. Watch the video and learn how easy it is to develop a fully functional embedded vision solution with the IDS NXT Experience Kit.

1. Create IDS user account
For the next steps, you need a free IDS user account. On the one hand, you can use it to download software and view manuals for your IDS NXT product; on the other hand, it also serves to access the cloud-based AI vision studio IDS lighthouse, with which you can create individual vision apps for your IDS NXT camera, among other things.
If you do not yet have an IDS user account, you can register for free via the login page.

2. Installing the IDS NXT cockpit
Next, install the IDS NXT cockpit, which you can find in the download area for your IDS NXT Experience Kit, among others.
There is also a detailed manual for the IDS NXT cockpit, where you can read how to connect the cameras, expand them with vision apps and parameterise for their tasks.

3. Put the camera into operation
Plug in
Connect the camera to the network that you also have access to from your PC using the included ethernet cable. This way you can easily establish a connection to the camera with the IDS NXT cockpit.
As power supply, both an external source (e.g. enclosed power supply unit) and Power-over-Ethernet (PoE) can be used.
It is also advantageous if you can access both the IDS webseite and the ai vision studio IDS lighthouse within this network. So you can easily access sample programmes, help documents and later your own developed vision apps.
Detailed instructions for putting the IDS NXT rio camera into operation can be found in the in-depth commissioning manual. You will need your IDS account for this!

Open
When you open the IDS NXT cockpit on your PC, the integrated "Device Finder" will display all ready-to-use IDS NXT cameras in the same network that you can use.
The easiest way to establish a network connection to your brand new camera is to have a DHCP server in your network from which the camera can obtain an IP address.
However, you can also establish a connection via static network addresses without a DHCP server.
The manual chapter "Finder" provides you with information about the different types of connections, how to assign an IP address and also about possible sources of errors.

Change password
To log on to your now connected camera, select the administrator profile with which you can make all necessary settings and configurations on the camera.
Initial password
By default, the password for each user class is "ids".
The first time you log in, you must change the password.
The complete procedure for this is described in the manual chapter "Logging on to the device".

Firmware update
Before you can start using your camera, you should update its operating system, the IDS NXT Camera OS. This ensures that you can work with the latest functions and run all sample applications.
You can check the current OS version of the camera in the IDS NXT cockpit. This procedure is also described in detail in the chapter "Updating per IDS NXT cockpit" of the commissioning manual.

4. Execute application examples
With the help of the IDS NXT cockpit, you can now try out and test your ready-to-use IDS NXT camera. The tool is self-explanatory and you can access camera parameters or pre-installed applications without further description.
If you still prefer a little more explanation of the IDS NXT cockpit, you will find help in the manual chapter "Working with the camera".
The camera comes with a couple of factory installed sample applications that you can use to try out the system's capabilities. To do this, go to the "VApp Manager" area. The two vision apps "Classifier" and "Object Detector" are particularly interesting for getting to know the system.

Classifier
contains 2 pre-trained neural networks: "ImageNet1000" and "KritzelNet". With both AI analyses, you can immediately test the AI method "classification" yourself without having to prepare any special application situations. All you need is a piece of paper, a pen and perhaps a few other common objects. The ImageNet1000 is trained to distinguish 1000 object classes.

Object Detector
Even with person recognition, you can get started immediately without much prior knowledge or preparation and discover what object recognition can do.

5. Create your own vision solution
With the IDS NXT Experience Kit, you can also implement your own AI vision in just a few steps.
Project start in the AI Vision Studio
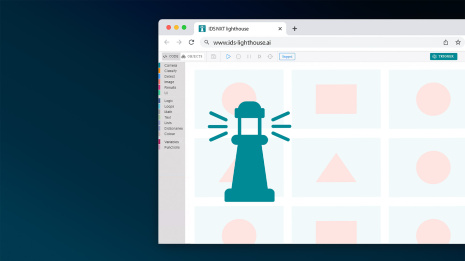
An important component in the IDS NXT ecosystem for achieving your goal is the cloud-based AI Vision Studio IDS lighthouse. The "It's so easy!" workflow guides you through all project phases until the application is ready to run on your IDS NXT camera. All you need to start the project is an internet-enabled PC and the browser of your choice.

Register & License
After you have logged in with your IDS user account, you still need to license IDS lighthouse. With the 6-month licence included in the Experience Kit (see licence card), you already have the key that authorises you to use it.
Free trial month
You can also simply activate the free trial month here, which is offered to you as a new user when you register for the first time. This also provides you with all the features of the AI Vision Studio without restriction.
You can also use the 6-month licence after this test phase.
Select project type
IDS lighthouse lets you choose how much help you want to use when creating an application.
Start with sample projects that will introduce you to the workflow and working methods in IDS lighthouse.
With the application wizard, you select a guided development from various configurable application-related scenarios. The wizard supports you up to the finished running vision app with many configuration options and hints.
If you feel confident and need maximum freedom to implement your ideas, start with an empty project. With this project type you have access to all tools and define the image processing flow of your application yourself.

Follow the workflow
No matter which project type you choose, the workflow view shows you at all times with status-dependent icons and notes where user interaction is still required or which components have already been successfully configured.